

For this project, we installed chair rail and battens to the plain sheetrock walls. In other words, we didn't install any "board" in this board and batten project.
Here is a TUTORIAL:
1. Decide you want the Board and Batten look. Hahaha! Of course you do!
2. Install chair rail. Normal chair rail height is between 32 and 36". For this project, we raised the chair rail up to 5'. The height we chose was based not on an exact dimension, rather what fit between switches and the thermostat. In other words, we eyeballed it.

3. We used 1/4" thick veneered plywood from Home Depot and cut them into 3 1/2'' wide battens using a table saw. We wanted battens to be thinner than our baseboard so the battens wouldn't stick out and 1/4" worked well. Also, you have flexibility on width; You may want wider or thinner battens depending on how large your space is and how tall your chair rail is.
4. Then we cut the battens to length from the top of the baseboard to the bottom of the chair rail.
5. The spacing between battens was based on proportions of our space but also considered the locations of outlets (which we didn't want to cover or cut around) and windows (we didn't want to cut battens to fit around window casings or sills). Again, there is a lot of flexibility on spacing. To find out spacing, we first found the center of our most complex wall (which had two windows and two outlets). That is where the center of the first batten went. We started with 6” between battens and taped the batons in place to see what they would look like (it covered an outlet, blurg). Then we went to 9” and it didn't work with the windows. Then we tried 8” and it was Juuuuuust right. This spacing worked out for the rest of the walls.
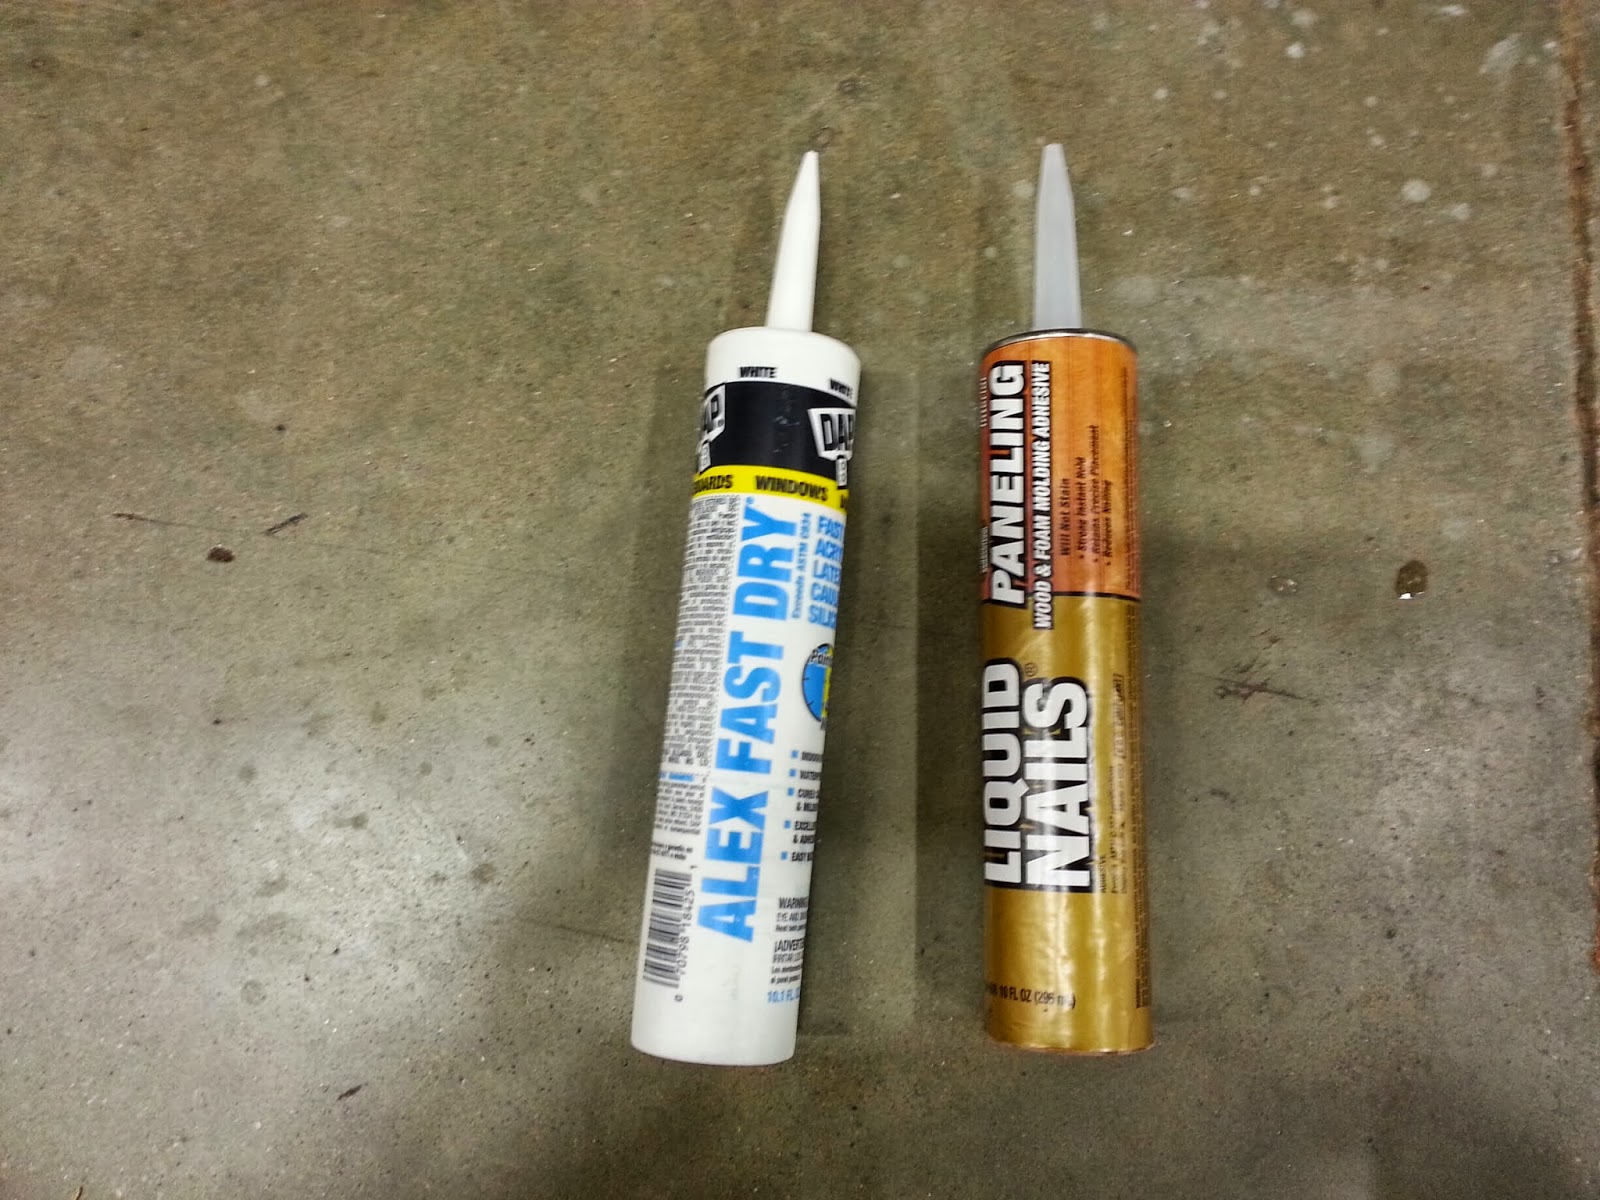
5. To secure the battens to the wall, we used Liquid Nails (for paneling) from Lowes. We also nailed the panels to the wall with a trim nail gun, which essentially held the battens in place while the Liquid Nails cured.
6. Fill in the nail holes (we used Dap nail filler), and caulk around the sides of each batten.

7. Once everything is dry, its prime time. Prime all un-coated wood. We normally use Zinzer water-based primer.
8. Then its time to paint. We painted the battens and the wall behind it with the same semi-gloss white trim paint that we used throughout the rest of our house. We did two coats of white and then stood back and admired the whole thing.
9. Once it's all done, do a victory dance (this is the most important step) and admire your new space.


.jpg)
.jpg)
Here are some other ideas for the board and batten look:

I love how this image takes the boards all the way up to the ceiling. Great cottage look.


The other thing I love about Board and Batten is the way you can still make your room look formal or more cottage-casual. Here are some more views of our room:
.jpg)
.jpg)


.jpg)

Can your husband put up board and batten in my house too? I love this look- especially with the Sea Salt!
ReplyDeleteTracy! Your home is beautiful! No surprise there. But I think if my house were to look like that I would need two things: a. to have Steve be my on hand free carpenter & b. be tracy Laverty for the super supreme-o classy decor. So impressive.
ReplyDeleteLaura! You are ultra kind. I know you and Tom are handy and could do this with no problems.
Deletehi Tracy!! you are so amazing!! we move in to our new house this weekend and I can't believe I just came across your blog when searching for ideas for the bottom 1/2 of a room! So..i have a quick question...you caulked around the boards on the vertical left and right to keep from having a crack/seam between wood and wall right? how much time does it take for the boards to dry? I'm thinking this is amazing and i want to try it!!
ReplyDeleteHi Rochelle! Great to hear from you. I'm excited for you to move into a new home. The boards are held flat against the wall by using the Liquid Nails. The caulking was used to hide the "end grain" of the plywood. We let the caulking dry for less than 24 hours. Good luck with your project and your move.
DeleteThis room is amazing and it really gives it a sophisticated look. Such a great idea!
ReplyDeleteWow- beautiful facelift. I love your blog already and look forward to your many future posts. The detailed instructions are perfect- just what I need- great job.
ReplyDeleteThis really is amazing! I'm looking around my house to find the perfect spot to do it. So glad you're doing this blog!
ReplyDeleteWhat a beautiful job!! Wish there was a show of how you flowed to the window's edge under the curtain. Makes for great family photographs. Excellent.
ReplyDeleteThis comment has been removed by the author.
ReplyDelete