Showing posts with label Decorating the tree. Show all posts

11.20.2014

Christmas at Lucketts

With Thanksgiving and Christmas around the corner, my mind has turned to ideas of how I'm going to decorate for the holidays. We'll be home for both occasions and I'm really looking forward to it. With four little girls at home, it's bound to be full of excitement and traditions. 

This is about the time of year, I'm looking for great ideas and ways I can make some of our decorations so it's affordable. Every November, the Lucketts Antique Store has a big Christmas weekend with charming decorations and glorious Christmas pageantry on display in their Design House. Who knows- maybe it will get those wheels turning in your head on how you'll decorate for the season. 
The entrance is uber charming with greenery, berries and gorgeous furniture. 
This light fixtures here blow me away! I also loved the branches with felt snowballs on the table. 
                            What a fun room! I love the bright red and turquoise blues throughout.
            I had some shopping buddies with me,  aka- my twins, who loved all the sparkles in here too. 
Hand me the glitter and pine cones! I'm getting excited about the coming month! How about you? Are you already scheming DIY decorating for the Holidays or is it just me?

12.20.2013

How To Make Your Fake Christmas Tree Look Not So Fake

 Yes, we are one of those families that have a fake tree. We love it! Putting this tree up is simple: three sections come together, fluff, pre-lit- enough said. However, I adore a real Christmas tree. For quite a few years now, it's been cost effective and like I said- simple to just put up what we have and be happy. In order to make our tree look not so fake I have done a few things that I think really help it look more real.
 Here is how our girls decorated the tree with all their ornaments. Not bad, but maybe it needs a little more decorating. I have been trying to go through some of my Christmas decorations and weed out the things I do and don't want anymore. I came up with a few sections of my favorites: star fish, ribbon, handmade fan ornaments, old Christmas cards turned into ornaments, and some cream and gold balls.

I had some clear glass balls I got last year on clearance that I painted mint condition, the leftover paint from the craft closet project
 Once it dried, I dry brushed on some splatters of pink paint to give it a textured look. Dry brushing requires very little paint on a dry brush and a paper towel to wipe off extra paint before you start paint. I simply swished some all around.
Add some real greenery in there to give it a fuller look. I also added several berry branches I clipped from our backyard. I wrapped the tree in the green striped ribbon. Throw in some pine cones and dried hydrangea and it's getting fuller. The point is to fill some of those gaps and give it a bit more texture.  
I also used some extra fabric I had in our house and wrapped it around as the base. Who says you need a tree skirt anyway? What I really love is the look with Christmas trees in buckets or baskets. Maybe next year. This year, our tree has quite a mix of treasured, handmade ornaments, natural elements and lights! Do you feel like you need to do some extra layers to your fake tree? I would love to hear and see what you've done!

12.19.2013

Christmas House Tour 2013

Welcome to our Christmas home! We haven't quite lived here for a year, but we are making headway into creating a comfortable place for our family. Our living room houses our Christmas tree, which has plenty of homemade ornaments and some dried hydrangeas. I recently finished sewing the curtains (tutorial soon), which help make our room feel cozier. 
My husband and I finished making the chalkboard above our mantle (another simple tutorial coming soon). Branches from our backyard trees were helpful this year in decorating our planters which have rosemary in them. 
I really love fresh greenery, so I've been clipping some trees. Let's just say, my morning runs were not just for running but collecting greenery (only public trees). It was a two for one deal! 
Our tree doesn't get presents under the tree until Christmas eve, which makes things a lot simpler to not have the temptation for young children to start tearing at gifts. Maybe someday I will buy or make a tree skirt, but this year I put some extra fabric around it. 
My mom gave me her Christmas village- which I've always thought was darling. Now, my girls love to see the village and the little people. Oh, and somehow, our elf, Paul got in the village last night. Sneaky elf!
Our kitchen has the peppermint wreath and a little banner I made too (Target dollar isle silver letters). The centerpiece is a moss wreath (handmade) with pomegranates.
My daughter, Alison, created a cute chalkboard wall for all of us and made the snowflakes too. I think it's  important to have our children get involved in the decorating and crafts too, don't you think? 
I love how our stocking chandelier turned out! For the table I decided to stick with simple white candles and of course, more cut greens.
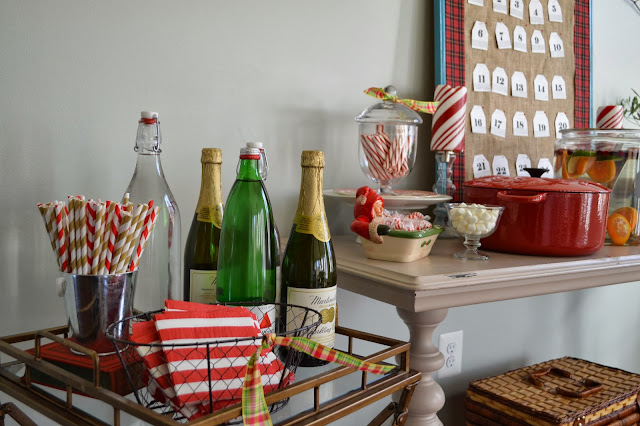
The buffet table has the advent calendar and goodies for cocoa. The small brass bar cart I got at a yard sale- (which I couldn't believe anyone would want to sell this- it's so nice). The chair I reupholstered (awhile ago), and was also a yard sale find. 
For our entryway, I put up a mix of natural berries (from our backyard) and fake ones on our banister going up the stairs. The black bench is a Craigslist find and same with the small blue table (that I painted).
           I hope you enjoyed the tour! Thanks so much for stopping by. Have a very merry Christmas!