Showing posts with label Under the stairs play area. Show all posts

1.08.2014

Easy Handmade Stencil Wall


 For our under the stairs play area I stenciled the back wall. There are so many stencils out on the market, however, since I wanted the design to be simple and colorful I decided to go with the arrow pattern that I made myself.
 Just use some card stock paper, an exacto knife and you can make any shape you want. I used colors we already had in our paint supply store basement.

Make sure you tape the sides and hold down the paper when you are paining- that way paint will have less of a chance spilling out.
If you make a mistake, like I did, then you can fix it by using the same wall paint to do any touch ups. Tip: use a fine brush. 
This project cost us literally no money since we had the supplies and paint. It took me about an hour and half. Creating your own stencil is perfect for a small area. However, I wouldn't try this same method on a large wall unless I was doing one color. I really like how it turned out and feel inspired to do something like this again for a future space- maybe our laundry room. 

1.03.2014

Under the Stairs Play Area Reveal

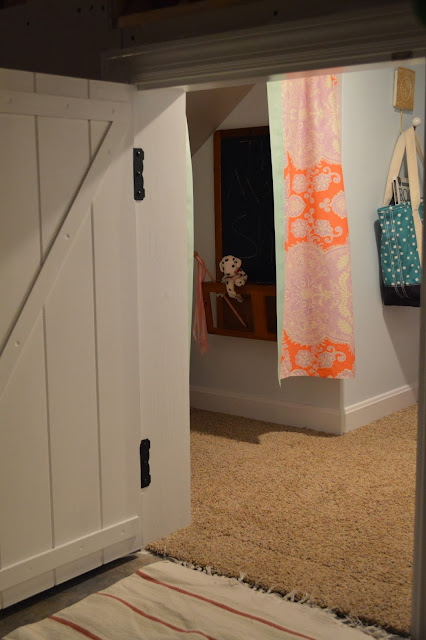
Our under the stairs play area for our girls is done on the inside. There still needs to be some work done on the outside, since this is an unfinished basement, but we want to show you how it turned out. My husband, Steve made this small barn door for their space (which is super sturdy). Let's go in shall we?
We presented it to them Christmas morning and they were thrilled. They knew we were working on it, but they got to see it finished that day.
I put in an IKEA chalkboard that I got at a thrift store. I made these coral and orchid (Pantone's color of the year happens to be orchid.) curtains with some mint ribbon trim. 
Most of the art work was something I made or we had and I cut things out and put them in dollar IKEA frames. The map came from a calendar of maps. I made the sign "The Four Sisters Club" and the fern print. The balloon picture is a Birthday card from Rifle and I re-labeled it "Be Uplifting." The fish print was something my daughter made in art class and the watercolor is something I made in college. 
       My husband installed an LED light so it won't heat up the space and create any problems for our girls.
We put down some carpet squares that we got from Wayfair. It was easy to stick to the basement floor and very affordable. 
 I lined the curtain with some mint ribbon. And they love that they have a place for puppet shows. I put some pillows and a small throw blanket in here since they might want to get cozy.
                                             We made our own stencil to get this design.
Here's a picture of some of the sheet rock halfway up in this space.  
Steve dry walled and mudded everything. He did a great job!
I think they like it! Having a small space finished in our unfinished basement is a step in the right direction. We will be working on the outside of the play house soon, but for now the inside is done and ready for play. I will put up this coming week some steps on how to build a small door and how we made everything for this space. Thanks for stopping over here and have a great weekend!

12.18.2013

Christmas Stocking Chandelier and Progress on our Project

 Life has been busy lately with some school concerts, planning parties, and Christmas baking. You know the drill- it gets a bit crazy for all of us in the month of December. Throughout all this 'hustle and bustle' I made a whimsical look for our chandelier by hanging stockings (got last year, after Christmas shopping) and gluing mint ribbon onto them.
We're also Santa's helpers (sweatshop) working on our playroom for our girls under the basement stairs. Steve made a door and put up walls and mudded everything. It's looking good. We ordered a small amount of carpet tile for the space, since our basement is unfinished, the carpet will be nice for their toes instead of cold concrete. The walls are primed and ready to be painted.
Progress! Come back tomorrow for our Christmas house tour.