Showing posts with label tween bedroom. Show all posts

5.16.2014

Add Bedding Details

Bedding can make a big difference in a bedroom. Most of the bedding I had been looking at for my daughter's bedroom makeover for the ORC was expensive and I just couldn't go there with my budget. Bedding can be expensive, but there are simple ways to add your own flare to inexpensive bedding or a sheet to create a chic look at a low cost.
 By adding coral grosgrain ribbon to a white Ikea duvet cover, I was able to create a timeless look. Here was my inspiration:
Bordeaux Bedding (Pink)
                                                          Land of Nod ($198)
                   
                                                             Crane & Canopy ($179)
First, I washed and ironed the bedding. I rolled out ribbon on the bed to see what shape I wanted to do. Hotel bedding is the inspiration here. I decided to go with not just your normal rectangle shape. At first I was thinking about mint, but then I went to JoAnn's and bought some coral ribbon.
                                                           
Once it was laid out, I used some fabric glue to help it stay in place and then I did a quick sew around to attach the ribbon to the bedding. I did the same shape on the pillowcases.

My cost $37

Why haven't I done this to more of our bedding? It was a simple project that added a lot of class. Have you ever done a ribbon trim before? I also realized that I didn't give out all my sources for her room so here it is:

Sources for room:
Ikea bedding
pillow (fabric)
fabric for headboard
curtains Ikea
paint: SW Naval, BM White Dove, (hutch) SW Charisma
bulletin board fabric
Vintage (or thrifted): desk and chair, hutch, chair, bench seat, lamp (spray painted), side table
art: Sisters watercolor, a lot of homemade art


Linking this post to: Home Stories A to Z
                               DIY by Design
                              
                               Best of the Nest

5.12.2014

DIY A Tall Headboard

I hope you all had a great Mother's day weekend. I felt spoiled with treats, flowers and my daughters gave me a spa evening by giving me a massage and polishing my toes. Being a mom is the best thing I have ever done!

Onto making a headboard! When working on our daughter's room makeover, I decided on a tall curvy look for the head board. Here's how we made it:
 1. Draw it out. The hubs used an Auto-Cad program to draw out our shape. However, you could simply draw out your shape and measure everything so it looks like the dimensions you want. Our shape is the dimensions for a full size bed.
 2. Cut it. We used a jig saw to cut the shape out of 1/2" OSB plywood (usually under $20).
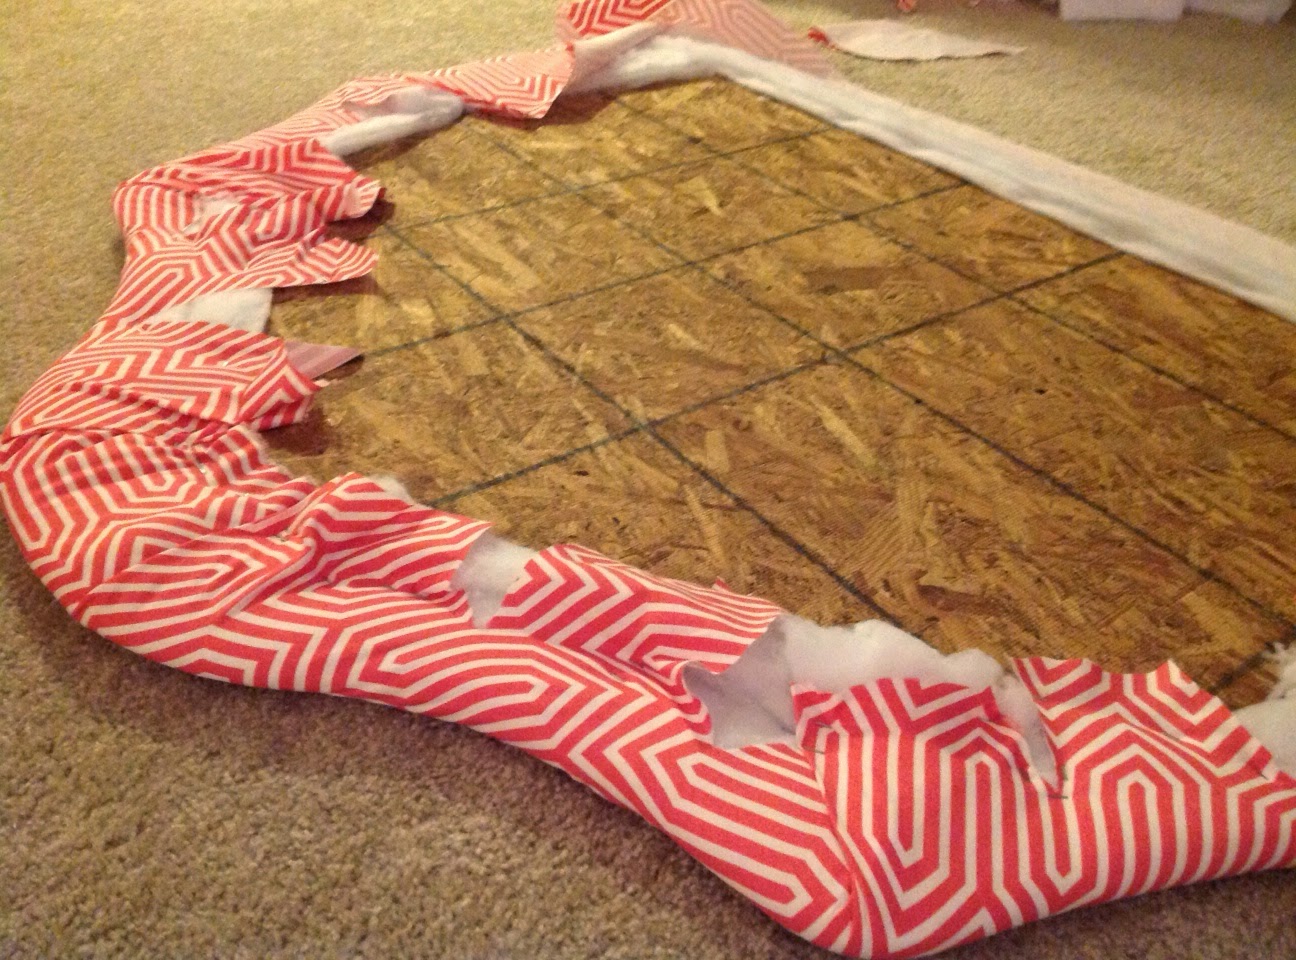
3. Batting. Staple the headboard with batting. I used two layers of batting. 
 4. Cut out fabric and staple. I should mention that before I cut the fabric I ironed all the wrinkles out first so that when we went to staple it would already be smooth. We cut slits in the back to avoid creasing in the curved areas of the head board. We pulled the fabric tight when we stapled the fabric (using an upholstery staple gun) so we would get a smooth finish.
5. Mounting the headboard. We measured how high we wanted the head board to be and then used two  2x4's (which we had on hand) and screwed it to the backing after we had installed all the fabric and batting.
6. Nail head trim. I found a great product for nail head trim (JoAnn's). This roll of nail head can easily bend into the shape needed. We used a tape measure to ensure the same distance from the edge all the way around. We really had to nail the tacks down since there were the two layers of batting. Once that's on then we put it behind the bed and pushed the bed back to the wall to admire this tall new curvy headboard.
The headboard cost us $65 to make. I got the batting and nail head trim at 50% off, or used a coupon at JoAnn's. The fabric is from fabric.com and I only needed two yards. Plywood usually costs about $20.

A headboard makes a big difference in the feel of a room and it's great when you're reading in bed and can lean your head against something comfortable. Have you ever made a headboard before? I would love to hear how you did yours. Next up is showing you how I made the bedding- it's super easy!

5.01.2014

Girl's Tween Bedroom Week 5 of the ORC


Time is going fast it's already week five of the ORC challenge. You can see the progress of the room so far here and here. I had  this white side table that's been in our family for a long time and decided it would look great as a bedside table. I'm still waiting for some of my fabric to come in (hopefully tomorrow!). I can't wait to staple the fabric onto the headboard we made. I did get a new duvet at Ikea and I will be jazzing it up with some ribbon trim. 
                         This little stool was a few bucks at a yard sale and will look great in here.
I got curtains at Ikea too.  The mess in the room is because I'm getting ready to paint the little hutch between the windows. I hoped there would be time to build some gorgeous window seats and shelves but my husband has been out of town lately and we went on a family trip over Spring break. Hopefully, we won't put off that project because we know our daughter would love it.
This cute desk will soon have a large bulletin board above it. 
On another note, Steve's mom gave us some beautiful furniture that's been in the family for awhile. Some of these pieces are really old and will need to be strengthened but I'm so excited! I love the curved dresser. We might find something here that can be incorporated into the room. Next week is the reveal of this room so I think I'll be busy doing some projects this week. You can check out here what other designers are working on for their rooms here and here.


4.23.2014

Girl's Tween Bedroom Week 4

I hope you all had a wonderful Easter. My family and I got back last night from a great trip out to Salt Lake City area visiting my parents (who are serving a mission for our church) and family. Our girls had so much fun playing with cousins. It's always great to reconnect with family! 
Before I left on our trip, I was able to get some more things done on our daughter's tween bedroom makeover that I'm doing and linking to the ORC. I mentioned I wanted to DIY a headboard for her room and found these images helpful for the shape I am looking for the headboard. 
Lots of pattern.
pattern on pattern
little girls room
John Robshaw headboard fabric, chic kids room, kids headboard, crewel fabric, clarence house, fun kid's bedding
I really love John Robshaw style bedding and headboards- they are so fun and colorful. 
This is the shape the hubs and I cut last week and I'm getting really excited to start picking out fabric. Also, the room got some paint and stripes on one wall, so it's starting to look like a bit of a transformation. 
Here's a peak with the newly painted white walls and stripes with navy. I can't wait to show you more as this room comes together. I'll be giving a tutorial on how we made the headboard after the reveal.