Showing posts with label makeover. Show all posts

4.30.2015

ORC Week 5: Headboard and Progress Update

Here we are in the 5th week of our master bedroom makeover for the One Room Challenge..gulp! I can be a  bit of a procrastinator so it helps me to have these deadlines. However, I will probably be cutting it close since there is still lots to do. You can catch up on the progress of the previous weeks here:
                       1                         2                               3                                4                                                                
However, this has been a productive week:
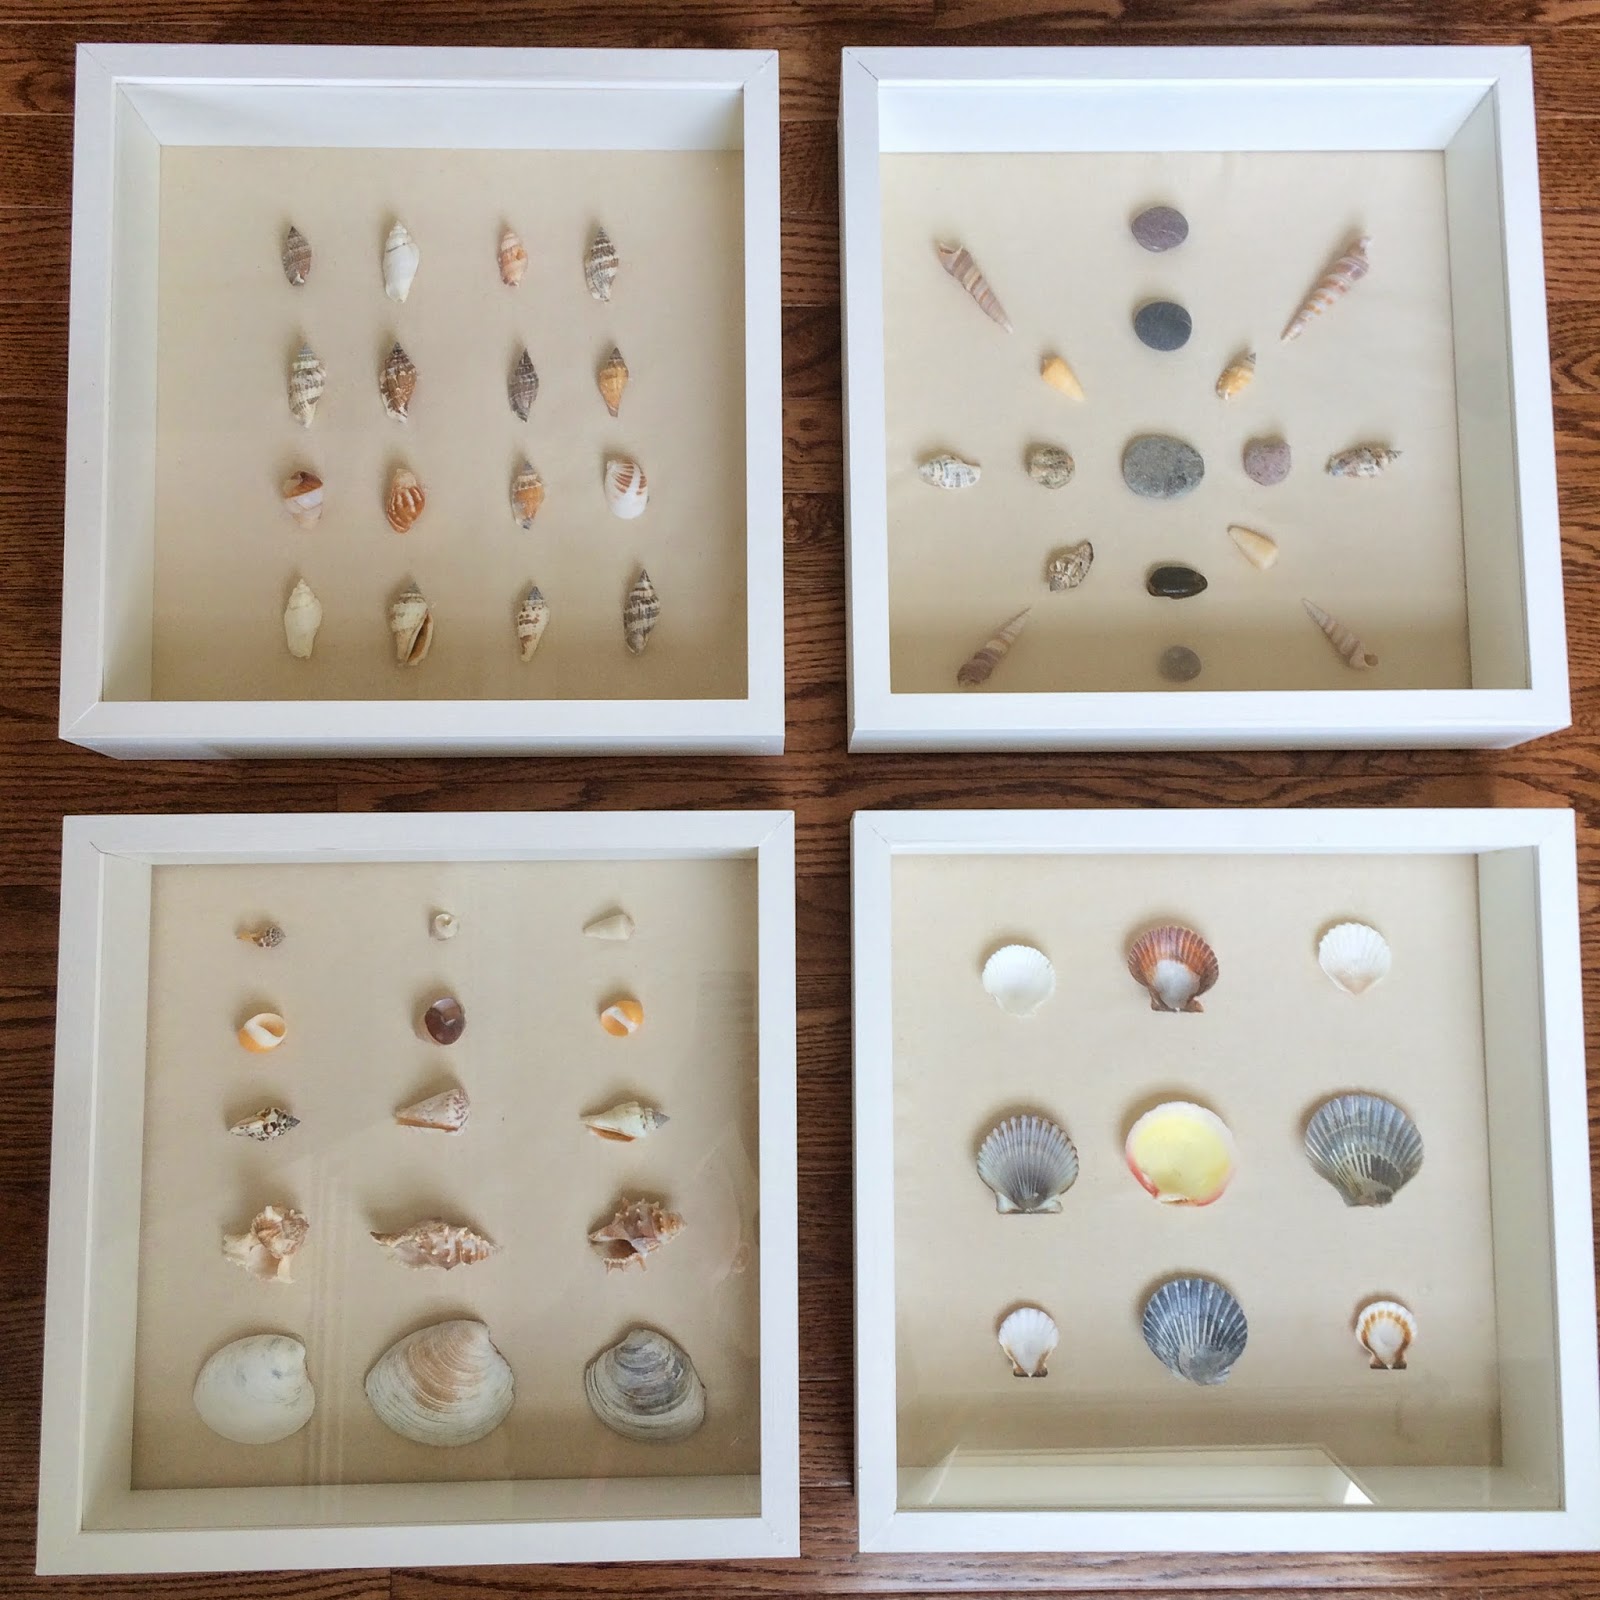
The hubs made these beautiful deep shadow boxes and I used a lot of hot glue to make some shell art. This will most likely go above our dresser. I'll post a tutorial on these babies soon.
I showed a preview on Intstagram of our DIY headboard! The height of it really makes a statement and I'm loving it! Now, I need to figure out if I want anything above our bed. I did have a black mirror, but I think it might be too large for the space. Also, this week, the curtains got lengthened by my friend Janet who offered to sew them for me. Talk about nice! She can sew well and faster than me.  I think they turned out pretty with the pleats. I have some pillows to sew and so you're seeing an image with me playing with fabrics. The bench is 95% done. I need to finish cutting off the excess fabric. I decided to paint the legs black and put a peacock green blue fabric on it to give it a rich color.

Big Craigslist deal this week. We bought two armories for a steal. The front one we'll keep for the bedroom and the second one we'll sell. We are planning to paint them this weekend. What do you think: white or gray paint? I plan on using gold pulls. Hmmm... I better make my decision today.  We have a sprayer, so that will help speed up the process (cross your fingers).

Also, I will be picking up this desk today. Next week, Steve and I celebrate our 15 year anniversary. I'm really glad we decided to do this challenge so we can have a beautiful space that we can enjoy. I love that guy!

Here's what still needs to happen this week:
-Sew pillows
-Finish dresser
-paint armoire
-put desk together
-hang photos and artwork
-finish bench
-Style and shoot

No big deal right? Now, I'm off to see what some of the other ORC challengers are up to. Come back here next Thursday for the reveal.

10.16.2014

One Room Challenge: The Laundry Room, Week 3

If you're new here and not familiar with the One Room Challenge it's basically a room makeover in six weeks. I'm working on a makeover in our laundry room. Only three more weeks until the deadline reveal. You can catch up on what's been happening on week one and two.
First, I looked for two cabinets for the wall with the washer and dryer. I  looked at the Re-Store (which has used building materials), Craigslist, and other stores. However, I wasn't able to find anything within our budget in the size we wanted. We (my hubby and I) decided to build them with the wood we had. We have a lot of scrap wood from other projects which we could use for these cabinets. We did have to buy some wood, but we are using what we have too. Above, is the frame of the cabinets. Next up is to put on the doors and start painting.
love this laundry room.   Clean in all white and my favorite sink!!!!!!  Love it.   A girl can dream about laundry rooms?  Heck, yes!!!!  I dream about every room from the kitchen, to my outdoor bath, to sunny bedrooms, and let us not forget my enormous his and hers closet.  More so....I am {dreaming about when the HIS is coming into my life as well}.
                                                                        source
We will be putting our cabinets on either side of the wall with a shelf in the middle, like this picture.

On the wall opposite of the washer and dryer we put up thin boards to give more texture to the wall. This is a picture of the boards primed.
Soon it will be white with a row of hooks above it and some art work or a drying rack. Like this idea:
entry
source

There is a lot more to do for the room:
-Paint room
-Paint cabinets
-Paint folding table (on top of washer and dryer)
-buy a rug
-drying rack
-hang hooks
-hang chandelier (and possibly paint it)
-baskets
-art work
-new cover for ironing board

I better get going on this list! Go check out what some of the other bloggers and designers are up to HERE and HERE. I'll have another update next week. Thanks for stopping by. 

10.09.2013

Thrift Store Buffet Makeover

Don't you love when you find a great deal? There is no better place than thrift store shopping to find one; diamonds in the rough. I found a small buffet at a Good Will for $12 and was thrilled. Some people might think-' yum, no. I'm not buying that.' But, think of all the potential!

Here's the before shot:

Here's how I transformed the buffet table:
1. Lightly sand all surfaces.
2. Wipe it down. If the piece is especially smelly our musty smelling- bring it outside on a nice day and air it out. Then, douse a cloth with a vinegar and water mix and wipe it all down. I found vinegar to be a great way to help get rid of odors and clean surfaces.
3. Take off the hardware. You can also replace the knobs really easily if you need to. I spray painted the knobs gold and reused them. I spray painted them with this Krylon gold plate spray:

I wasn't sure if I could get those basket weave door-fronts off, but with a bit of prying they popped right out.


4. Prime it. For this table I used Zinzer oil based primer. This is the stinky stuff, but I found it's a great primer for adhering to laminate. Sometimes I use spray-paint primer - especially if it's difficult to get into the crevices and hard-to-reach nooks and crannies.
5. Paint. I chose Valspar's Peacock Blue in a Satin finish. I added a few tablespoons of Floetrol to the paint. Floetrol helps your painting go on smoother so you don't see brushstrokes (its essentially a thinning agent). This is especially important when using a true gloss finish. I did two coats of the paint. The Floetrol comes in this orange container (you can see it in this picture to the right).
6. Almost done... Once it's all dried you should protect your new beauty with either wax or Polyurathane. I did one coat of Poly in Satin for the table. Once its on and dried the Poly helps protect against scratches and the occasional 4-year-old.
Yes- sometimes I paint while my children watch a movie. (This is a picture of our old home in the basement.)

The lamps were also a thrift store find as well for $10 each. I spray painted them a cheery yellow. More about spray painting coming soon. Have you ever bought a piece of furniture with potential? I would love to hear what you did with it!